A hiring pipeline is used to sort your candidates based on the different stages of the interview process. Rooster has this feature in our ATS to make the interview process easier for you. But, did you know that you can create a custom hiring pipeline? If your answer is ‘no’, check out this step-by-step guide.
Step 01: Login to your Rooster account
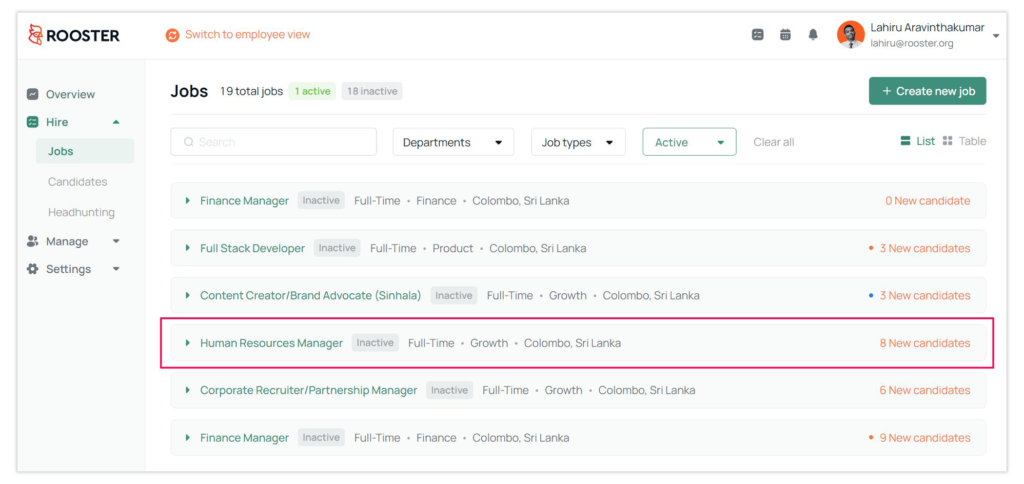
Step 02: Select the job
On your dashboard, click on ‘Jobs’ and click on the job you want to create a custom hiring pipeline for.
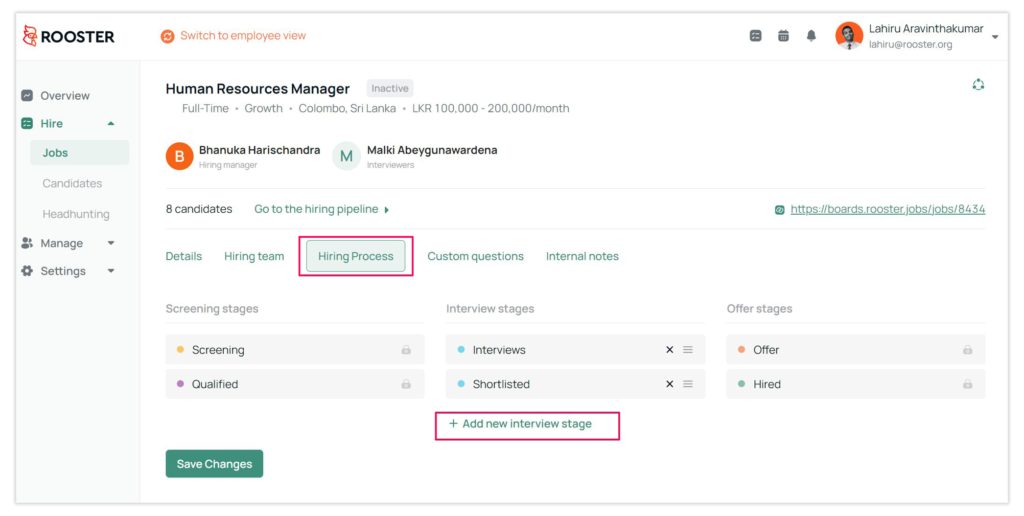
Step 03: Click on ‘Hiring Process’
Once you click on ‘Hiring Process’, you will see the stages of your interview process. Then click on ‘Add new interview stage’.
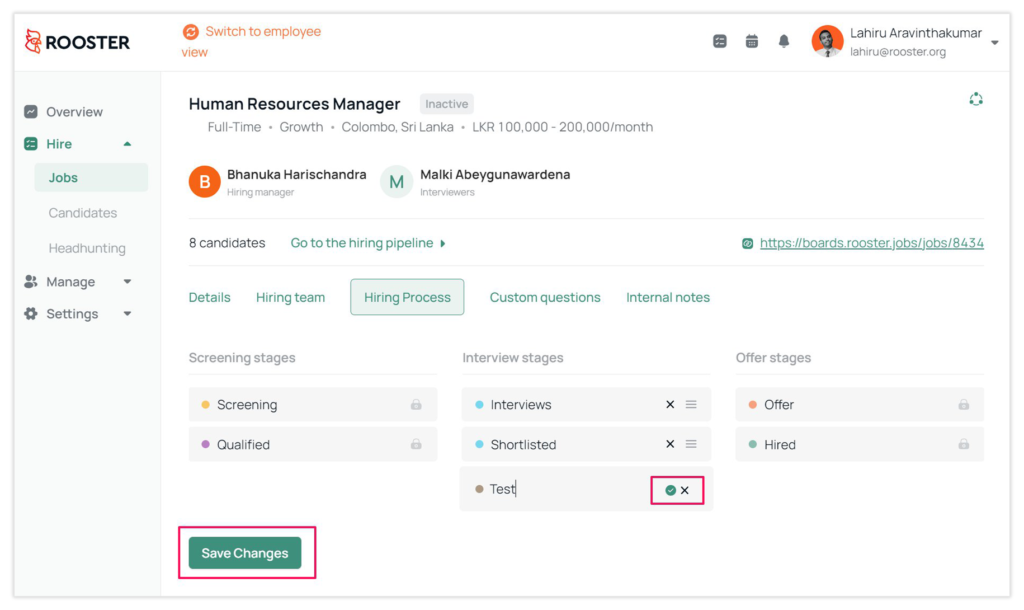
Once you have named the newly added interview stage, click on the ✔ icon and click on ‘Save Changes’.
You can also delete the interview stages by clicking on the X mark in front of the text.
Step 04: View the new hiring pipeline
Click on ‘Go to the hiring pipeline’.
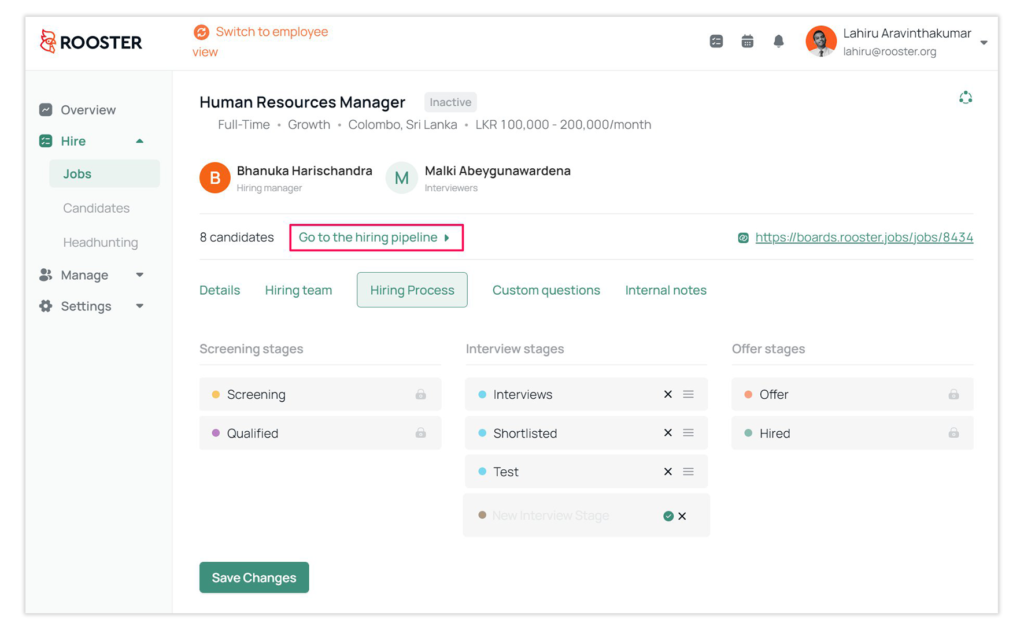
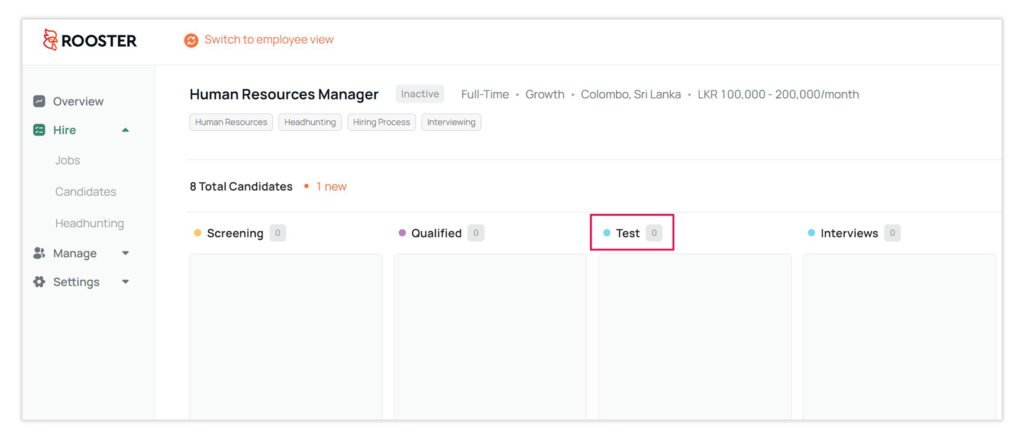
You will see the newly added interview stage like this.



 Free for Startups
0 Comments